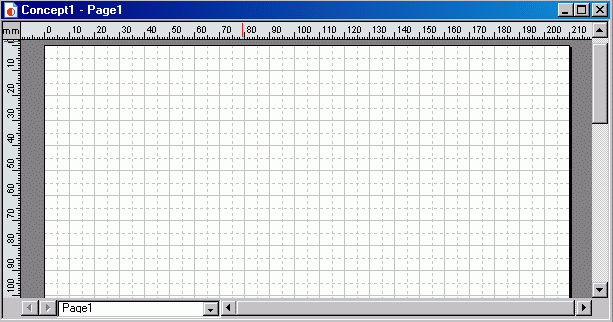
This window is used for working with the document, or editing shapes inside a group (called from Shape / Edit Group menu).
Normally this window looks as follows:

On the left and top sides of the window you can see the rulers. The grid helps to position shapes more precisely.
To get a horizontal or vertical guide line, drag it out of the corresponding
ruler.
For more information about the guide lines see Document - Working with
a Document - Guide Lines and Gluing Shapes.
On the right and bottom sides you can see the scroll bars. They are used for
navigating through the document. To scroll beyond the drawing page, click and
hold the mouse button on the arrows near the scroll bars.
For more information see Document - Working with a Document- Scrolling.
 In the left bottom corner of
the window there's a drop-down list with the names of the pages, which is used
to switch between the pages. To go to the next and previous pages you can use
the arrows besides the list.
For more information see Document - Working with
Pages.
Note: This drop-down list is not displayed in the Edit Group mode, because a group can't be located on more than one pages.
You can change the appearance of the document window.
You can display or hide the grid and rulers.
The grid and rulers parameters are set in the Grid & Rulers
dialog, which you can call from the Tools / Grid & Rulers
menu.
For more information see Document - Working with a Document- Rulers
and Grid.
To display/hide the rulers, the guide lines and the grid, use the View
menu or the View toolbar.
To show/hide the rulers, use the View / Rulers menu; to show/hide
the grid use the View / Grid menu, to show/hide the guide lines
use the View / Guides menu.
Sometimes a document can be larger than one printer page. In this case the program
will break the document down and arrange it on several printer pages. To view
the page breaks, enable the Page Breaks option in the View
menu.
For more comfortable editing you can zoom in or out on the document by using
the View / Zoom menu, or the Zoom toolbar.
For more information see Document - Working with a Document - Zooming,
Toolbars - Zoom.
When you right-click somewhere in the window, the context menu appears. It contains various commands for working with shapes. For more information about this menu see Menus - Document View Context Menu.